HBDY5 series button is our latest developed high current button. On the basis of the original xb2 button on the market, it adopts a new snap-fit installation method, nut-fixed panel, rotary snap-type base, and free-assembled contact module, which makes the installation faster, better and more stable.
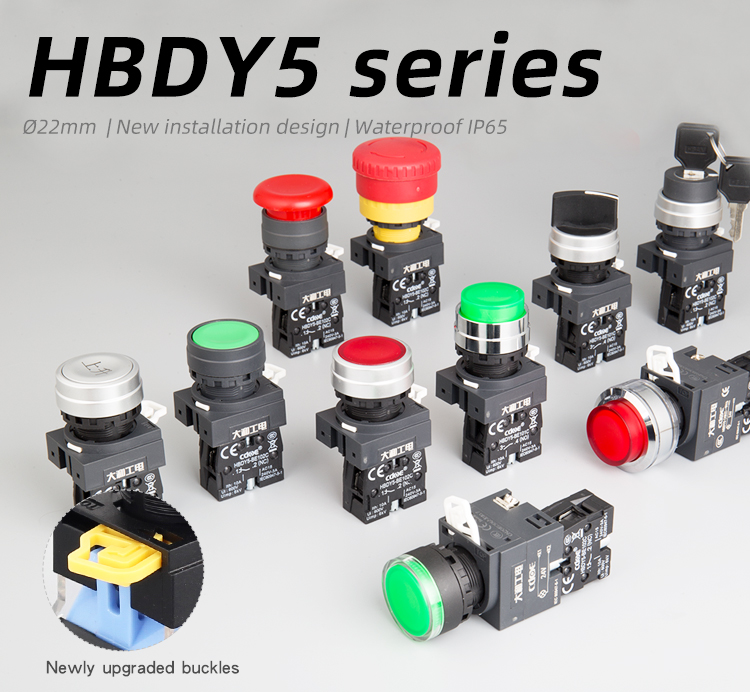
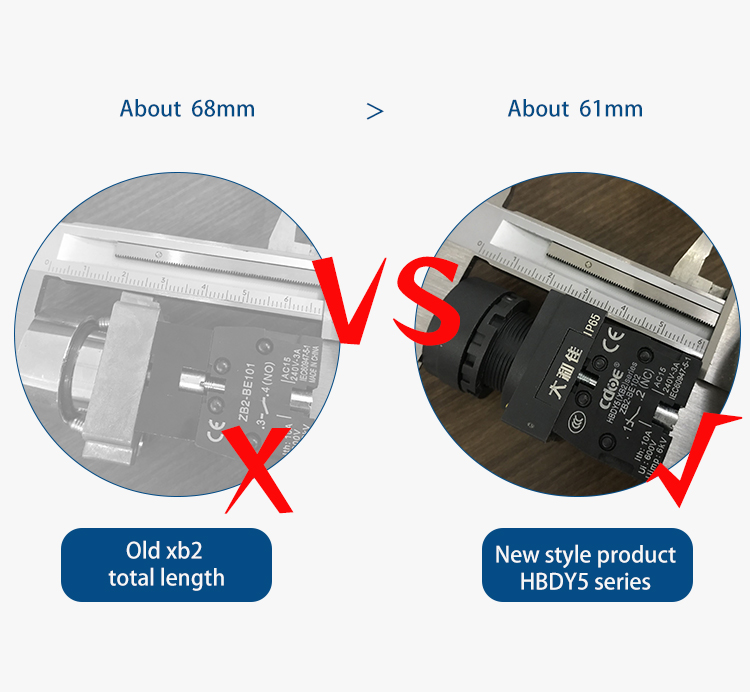
There are various types of button heads, including high head, mushroom button, ring led, power symbol, and emergency stop style head.Can Select momentary or latching operation type. The length of the lock button is shortened by 0.7mm on the basis of the original xb2 on the market. It is shorter and more convenient than the old style. The latching effect of the head is more abrupt and more user-friendly.
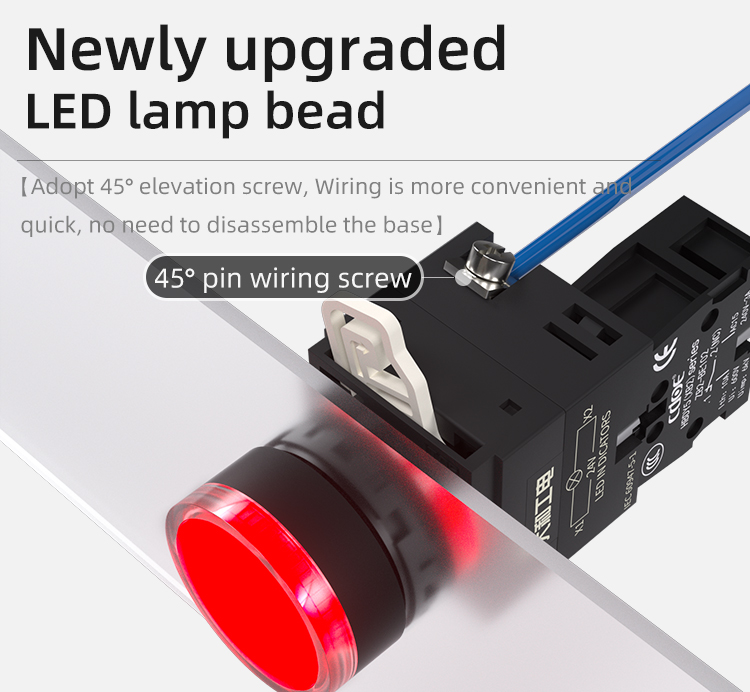
Built-in waterproof rubber device, the head is waterproof IP65, breaking through the defects of the old models in the market that are not waterproof, and easily adapt to the outdoor environment. The 10A current slow-action segmented contact has a certain segmenting function. The independent lamp bead device has vibration resistance, and can prevent short circuit and electromagnetic interference at the same time. The lamp holder adopts a 45° elevation angle screw, which is more convenient and labor-saving for wiring.
So how do we go about assembling the buttons for our new HBDY5 series?
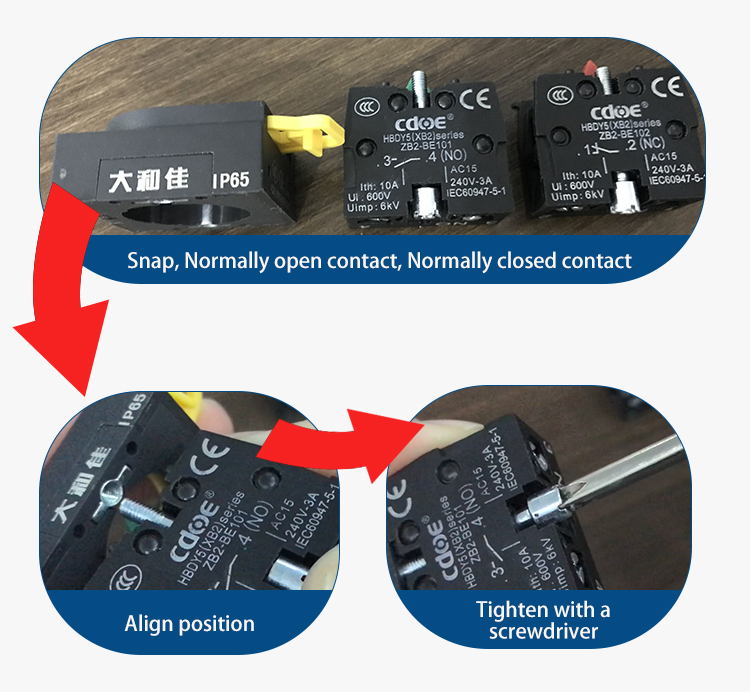
1.Contact installation method
①Snap、Normally open contact(Green),Normally close contact(Red);
②Align position;
③Tighten with a screwdriver;
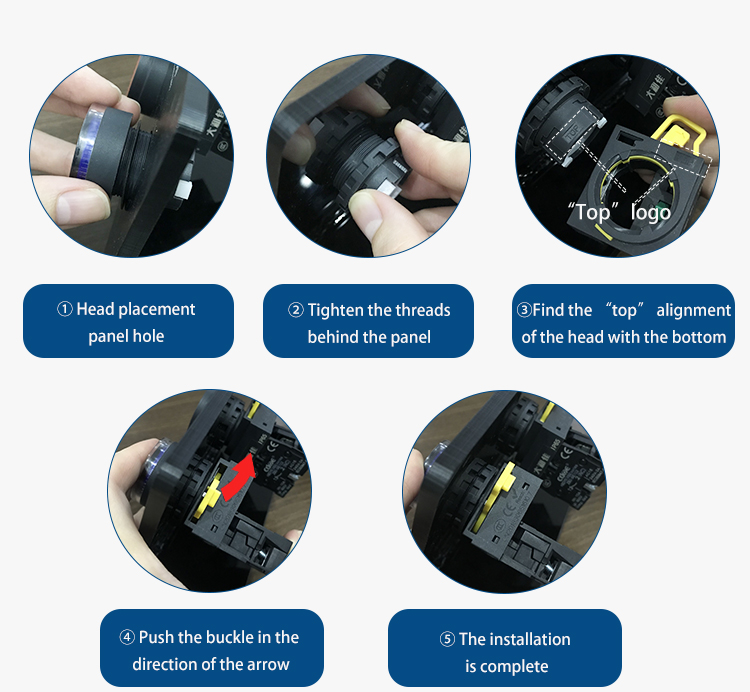
2. Panel installation method
①Head placement panel hole;
②Tighten the threads behind the panel;
③Find the “top” alignment of the head with the bottom;
④Push the buckle in the direction of the arrow;
⑤The installation is complete;
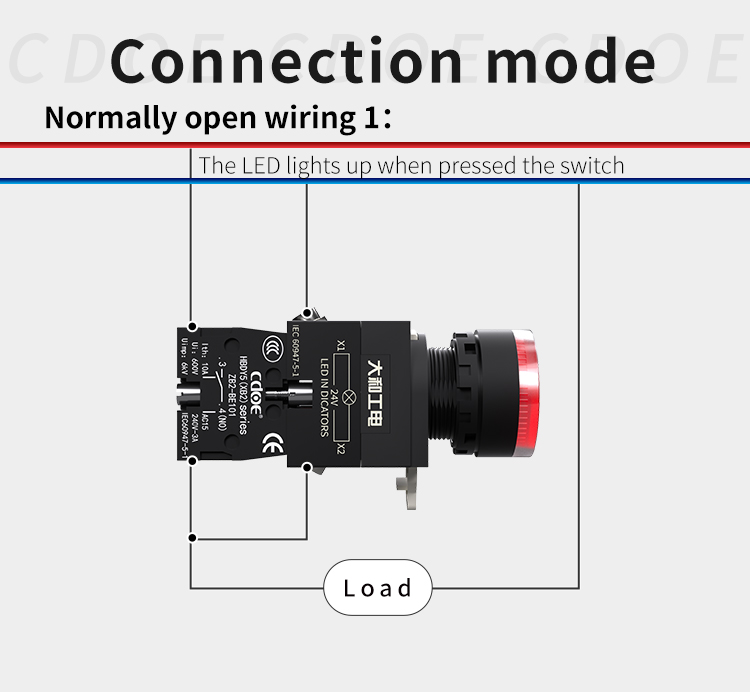
3. Wiring installation method